How To Replace Adjustment Brackets
When you first buy a chaise lounge it works perfectly for a few years, but after those years in the sun the adjustment brackets that allow you to recline to different degrees start to break, oh no! What do you do then? Well, you replace them!
Replacing adjustment brackets is easy with the right tools, and were going to show you just how to do it today.
If you prefer to watch this process, weve also made a video for you!
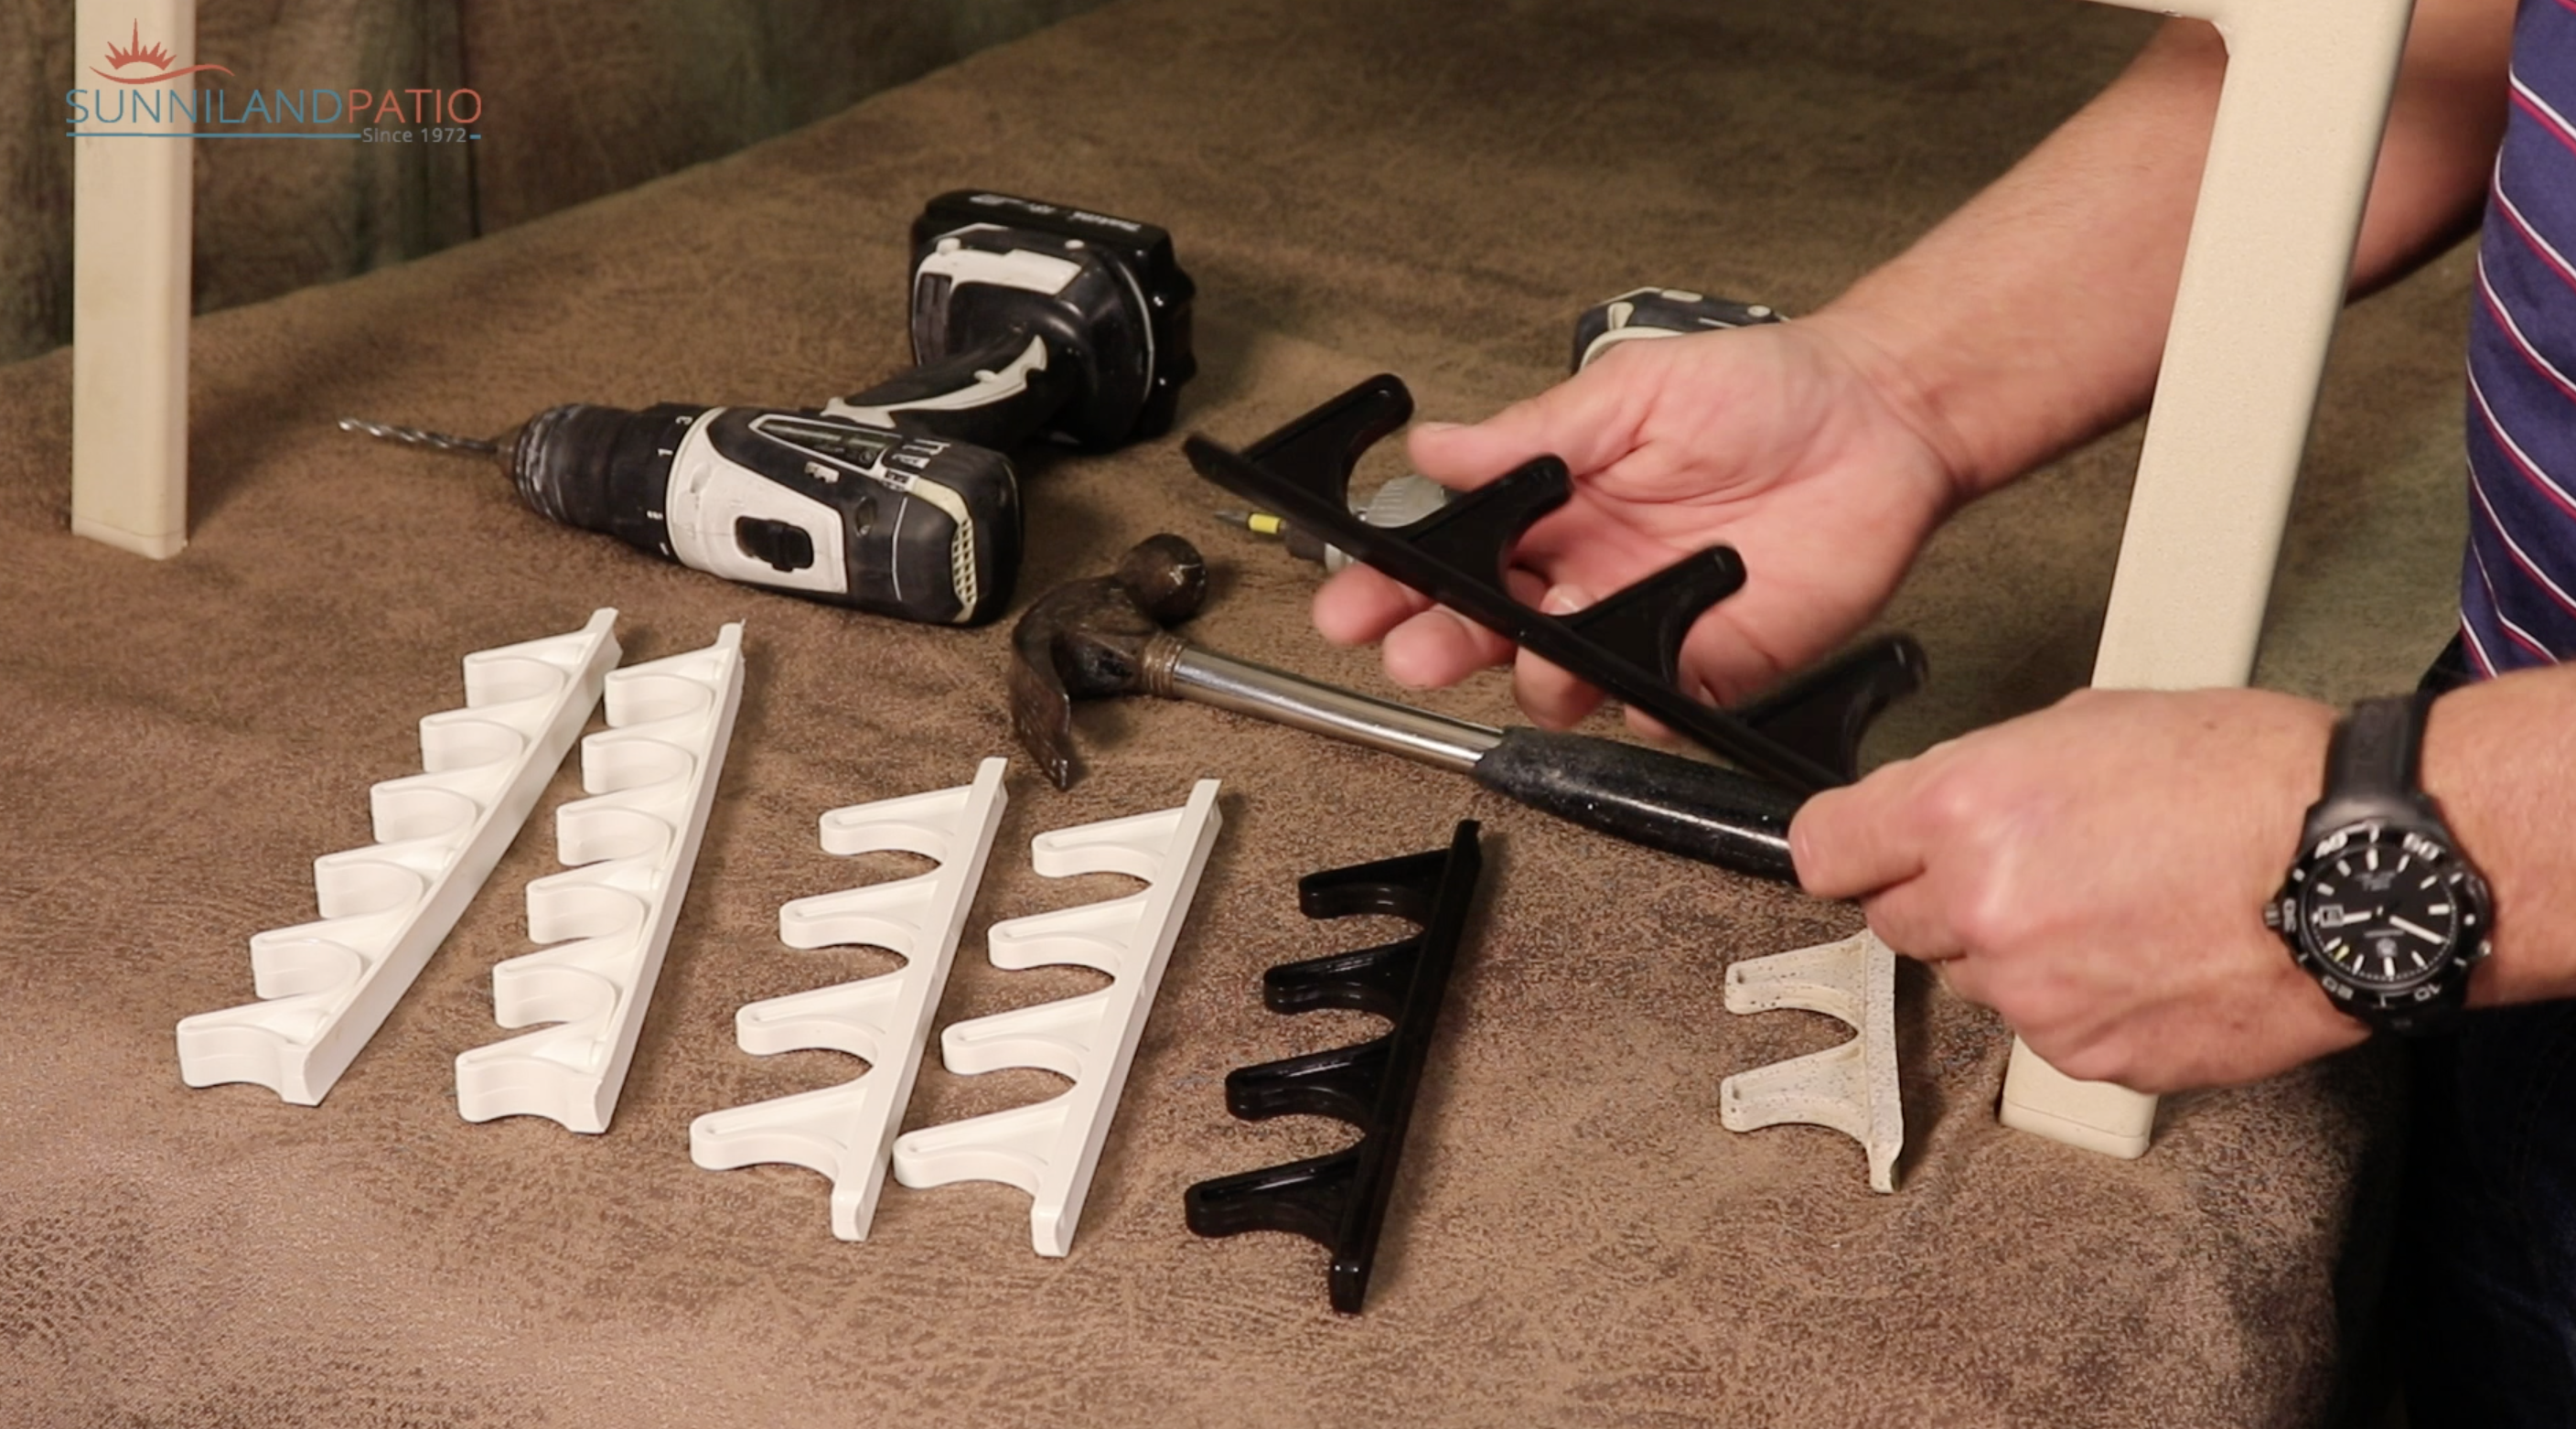
Step 1: Gather the right tools and brackets
Before starting your project, make sure that you have purchased the replacement adjustment brackets. Theres the 4 position bracket or the 6 position bracket, it just depends which your chaise have. You can buy either bracket at our online store: 4 position bracket, 6 position bracket.
Next you want to have the right tools for the job: a hammer, a pair of pliers, a drill with a Phillips bit if you have Phillips screws of course, sometimes youll need a new drill bit specifically a 5/32 drill bit, and some number 10, 1/2 inch screws.
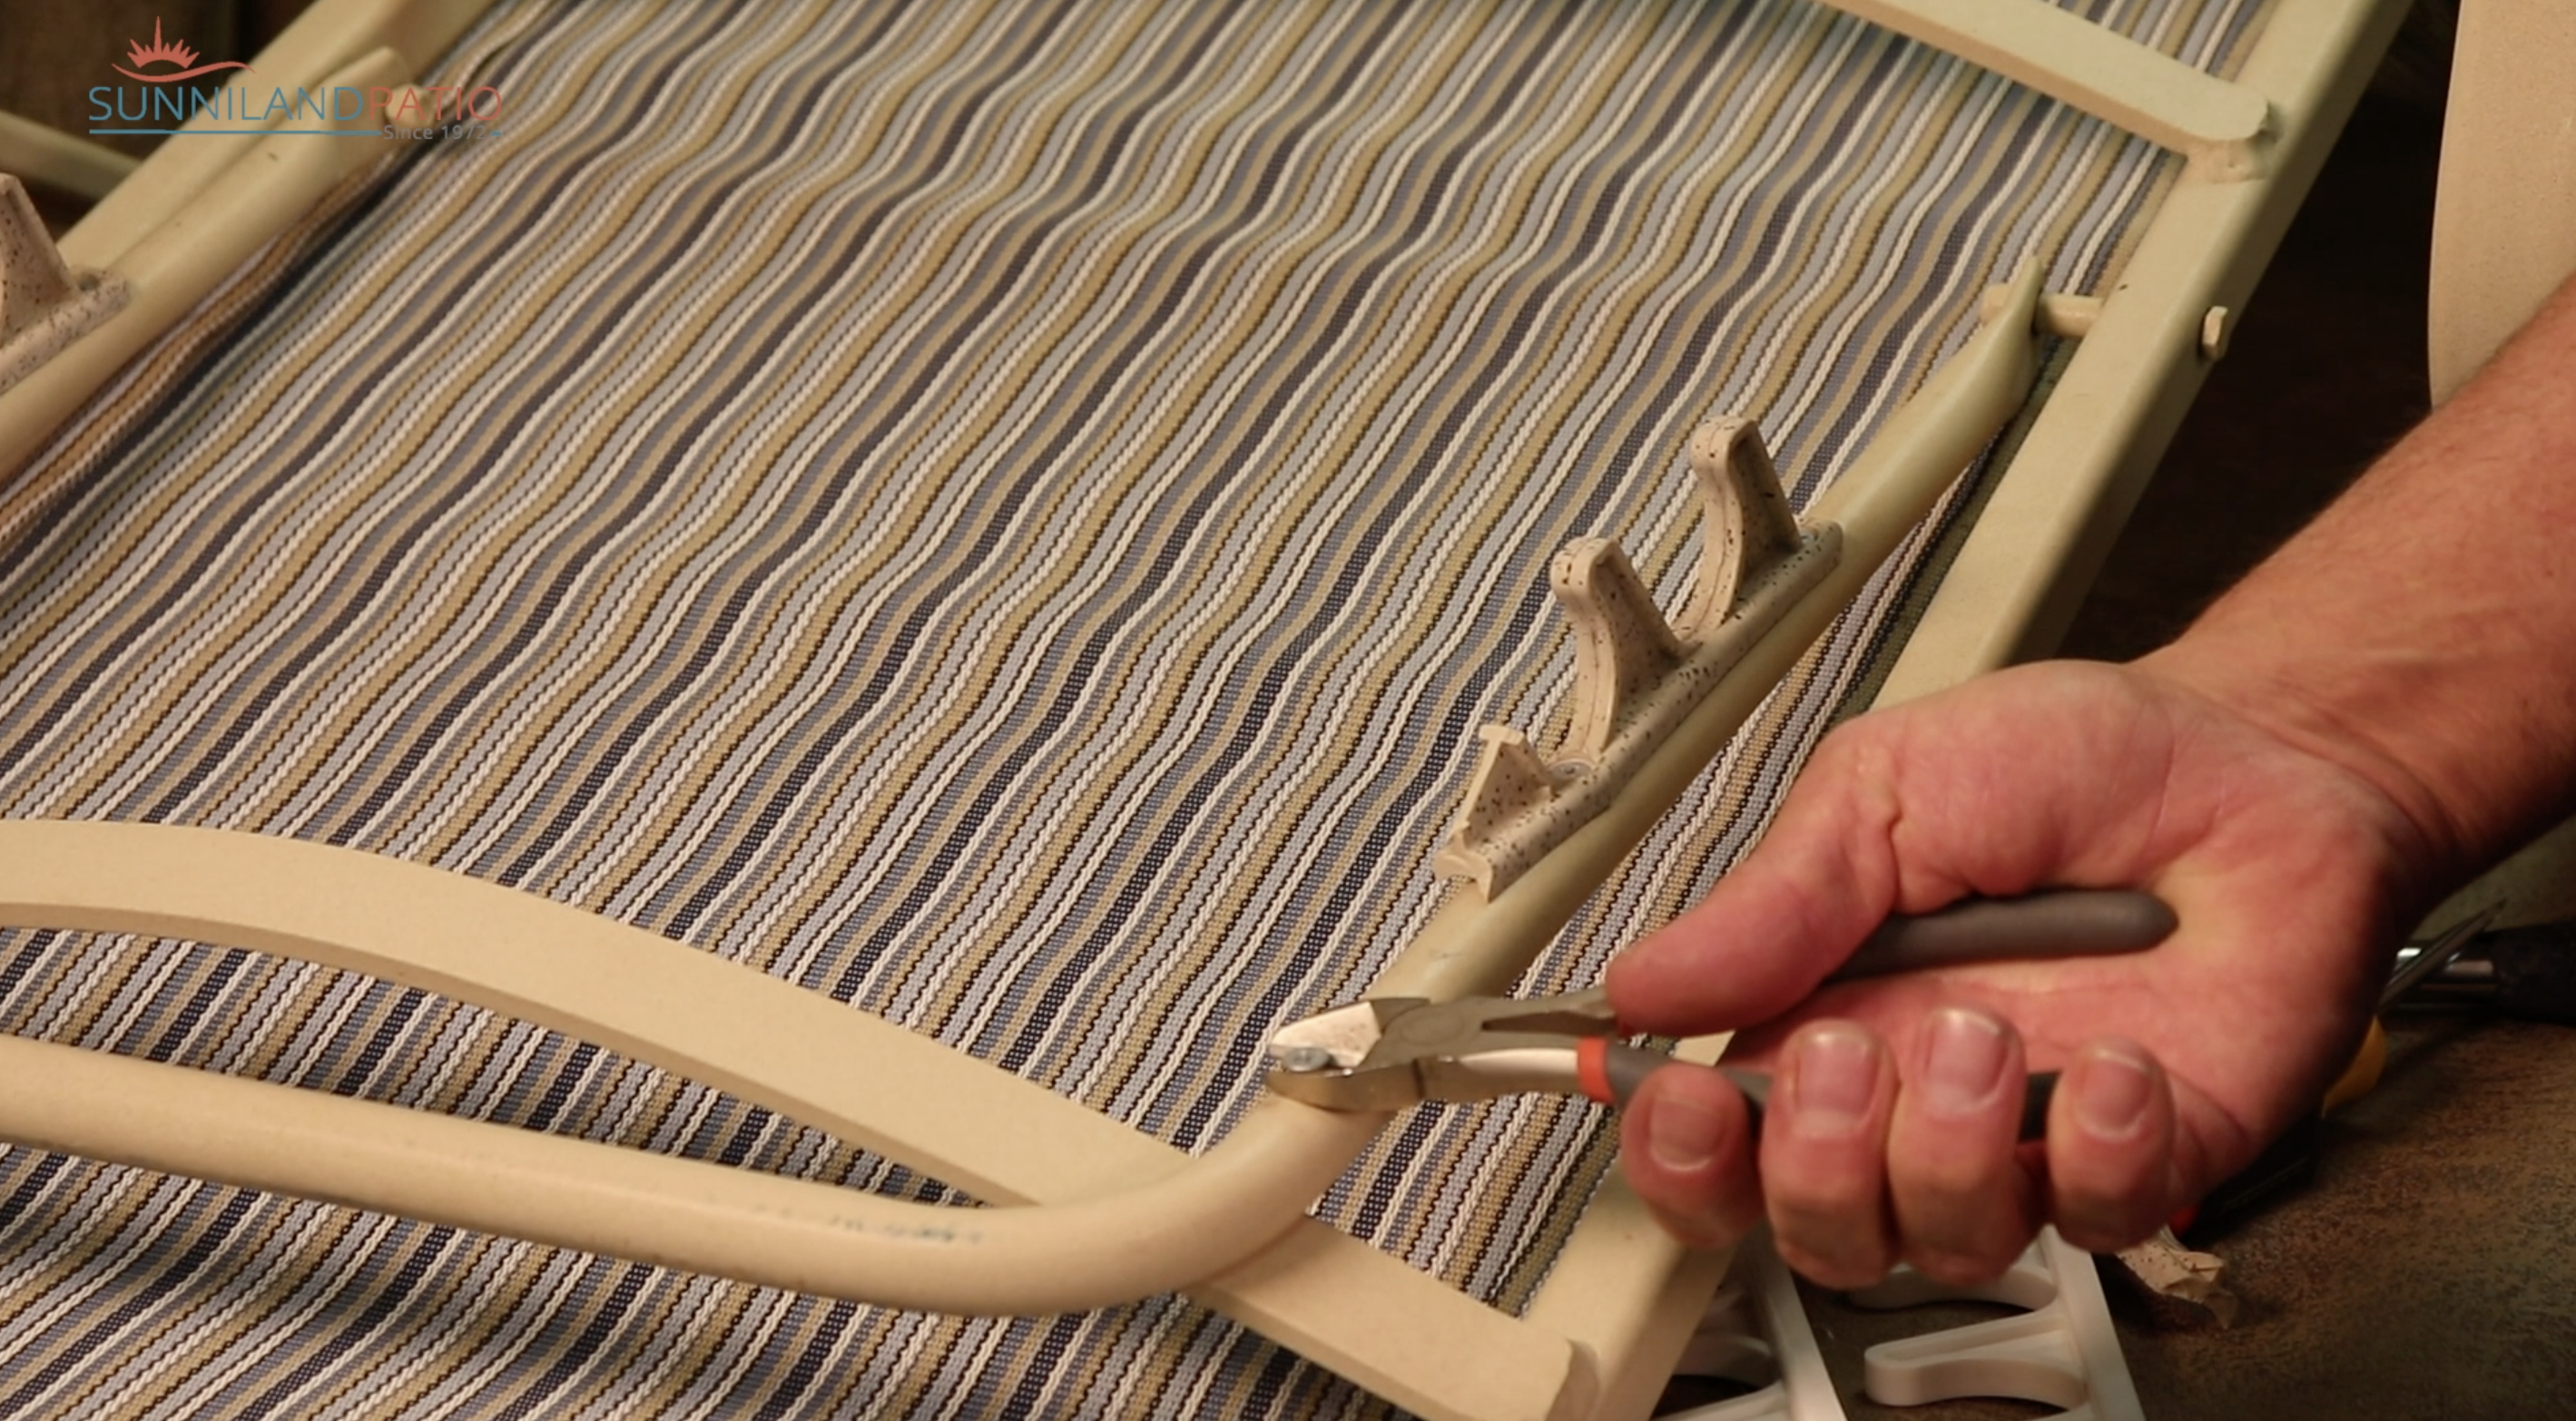
Step 2: Remove the old brackets
Sometimes the old brackets are factory installed using rivets, and sometimes they come installed with Phillips screws. Its easier if they are factory installed with Phillips screws because you can simply unscrew them. However if they come factory installed using rivets, use the hammer to break off the brackets
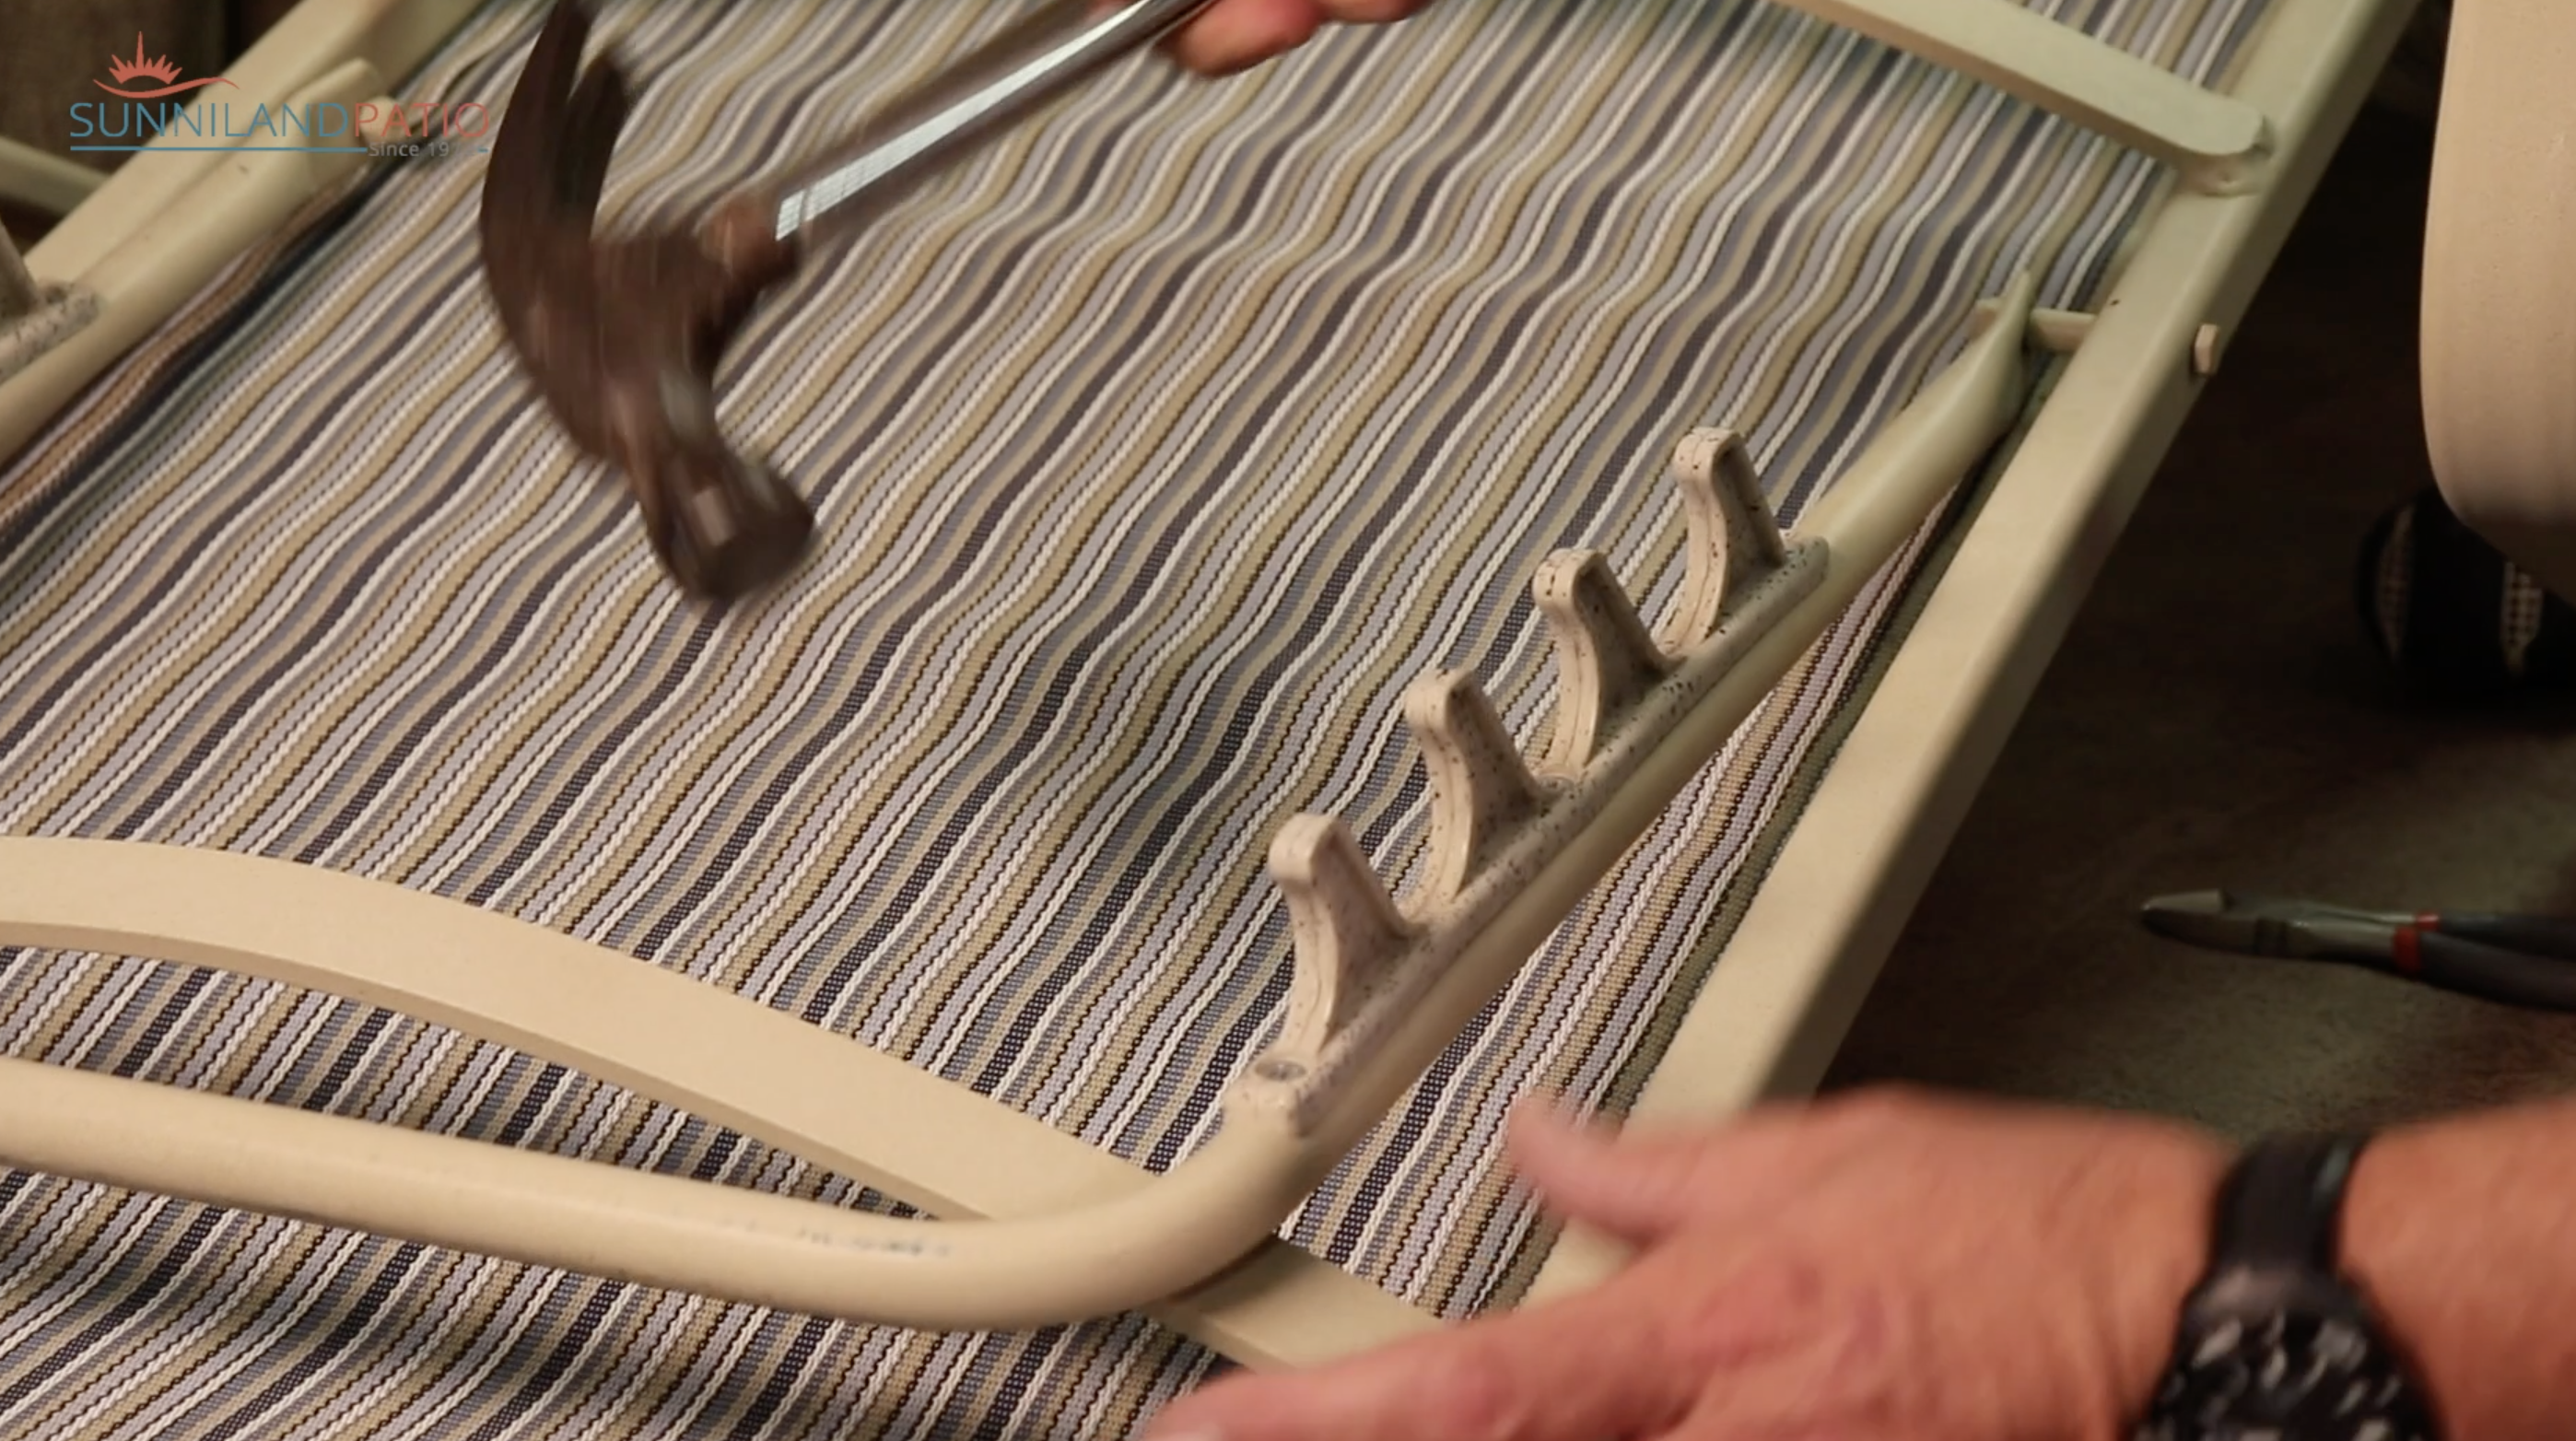
Or you can take a screw driver to pry off bracket.
After that, you use a pair of snips to cut off the end of the rivets and/or drill out rivets until you have a clean hole to install new rivets.
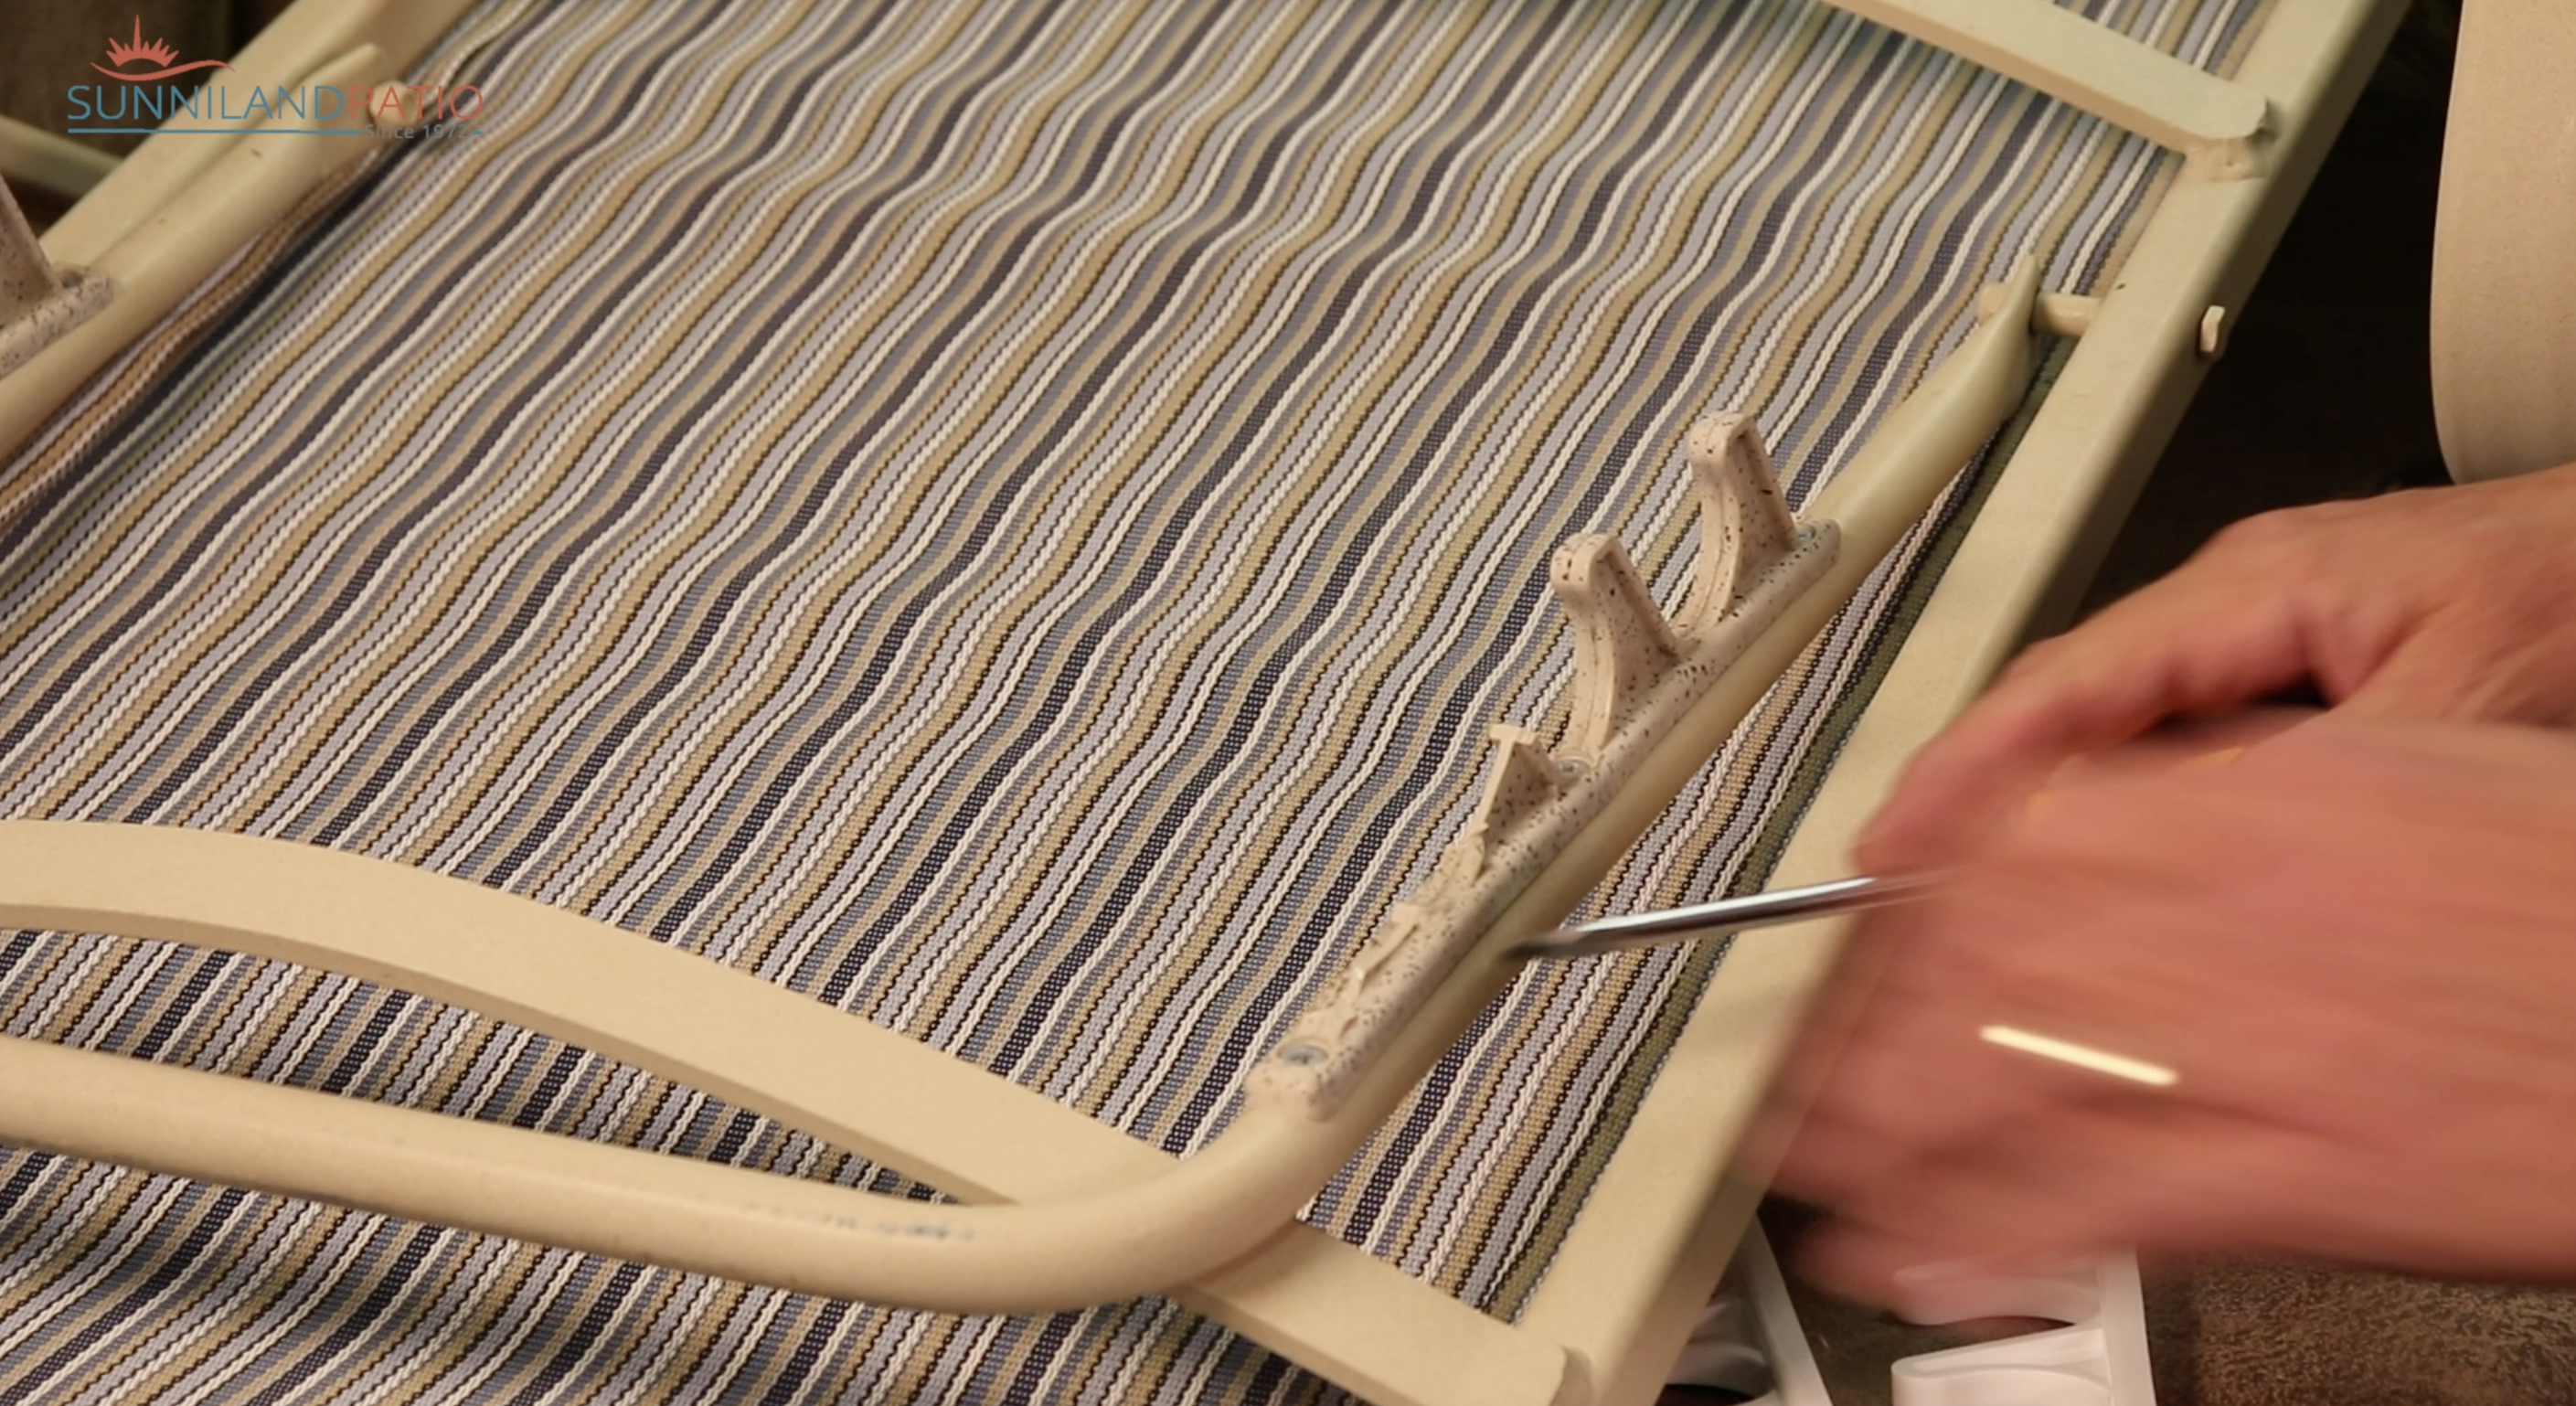
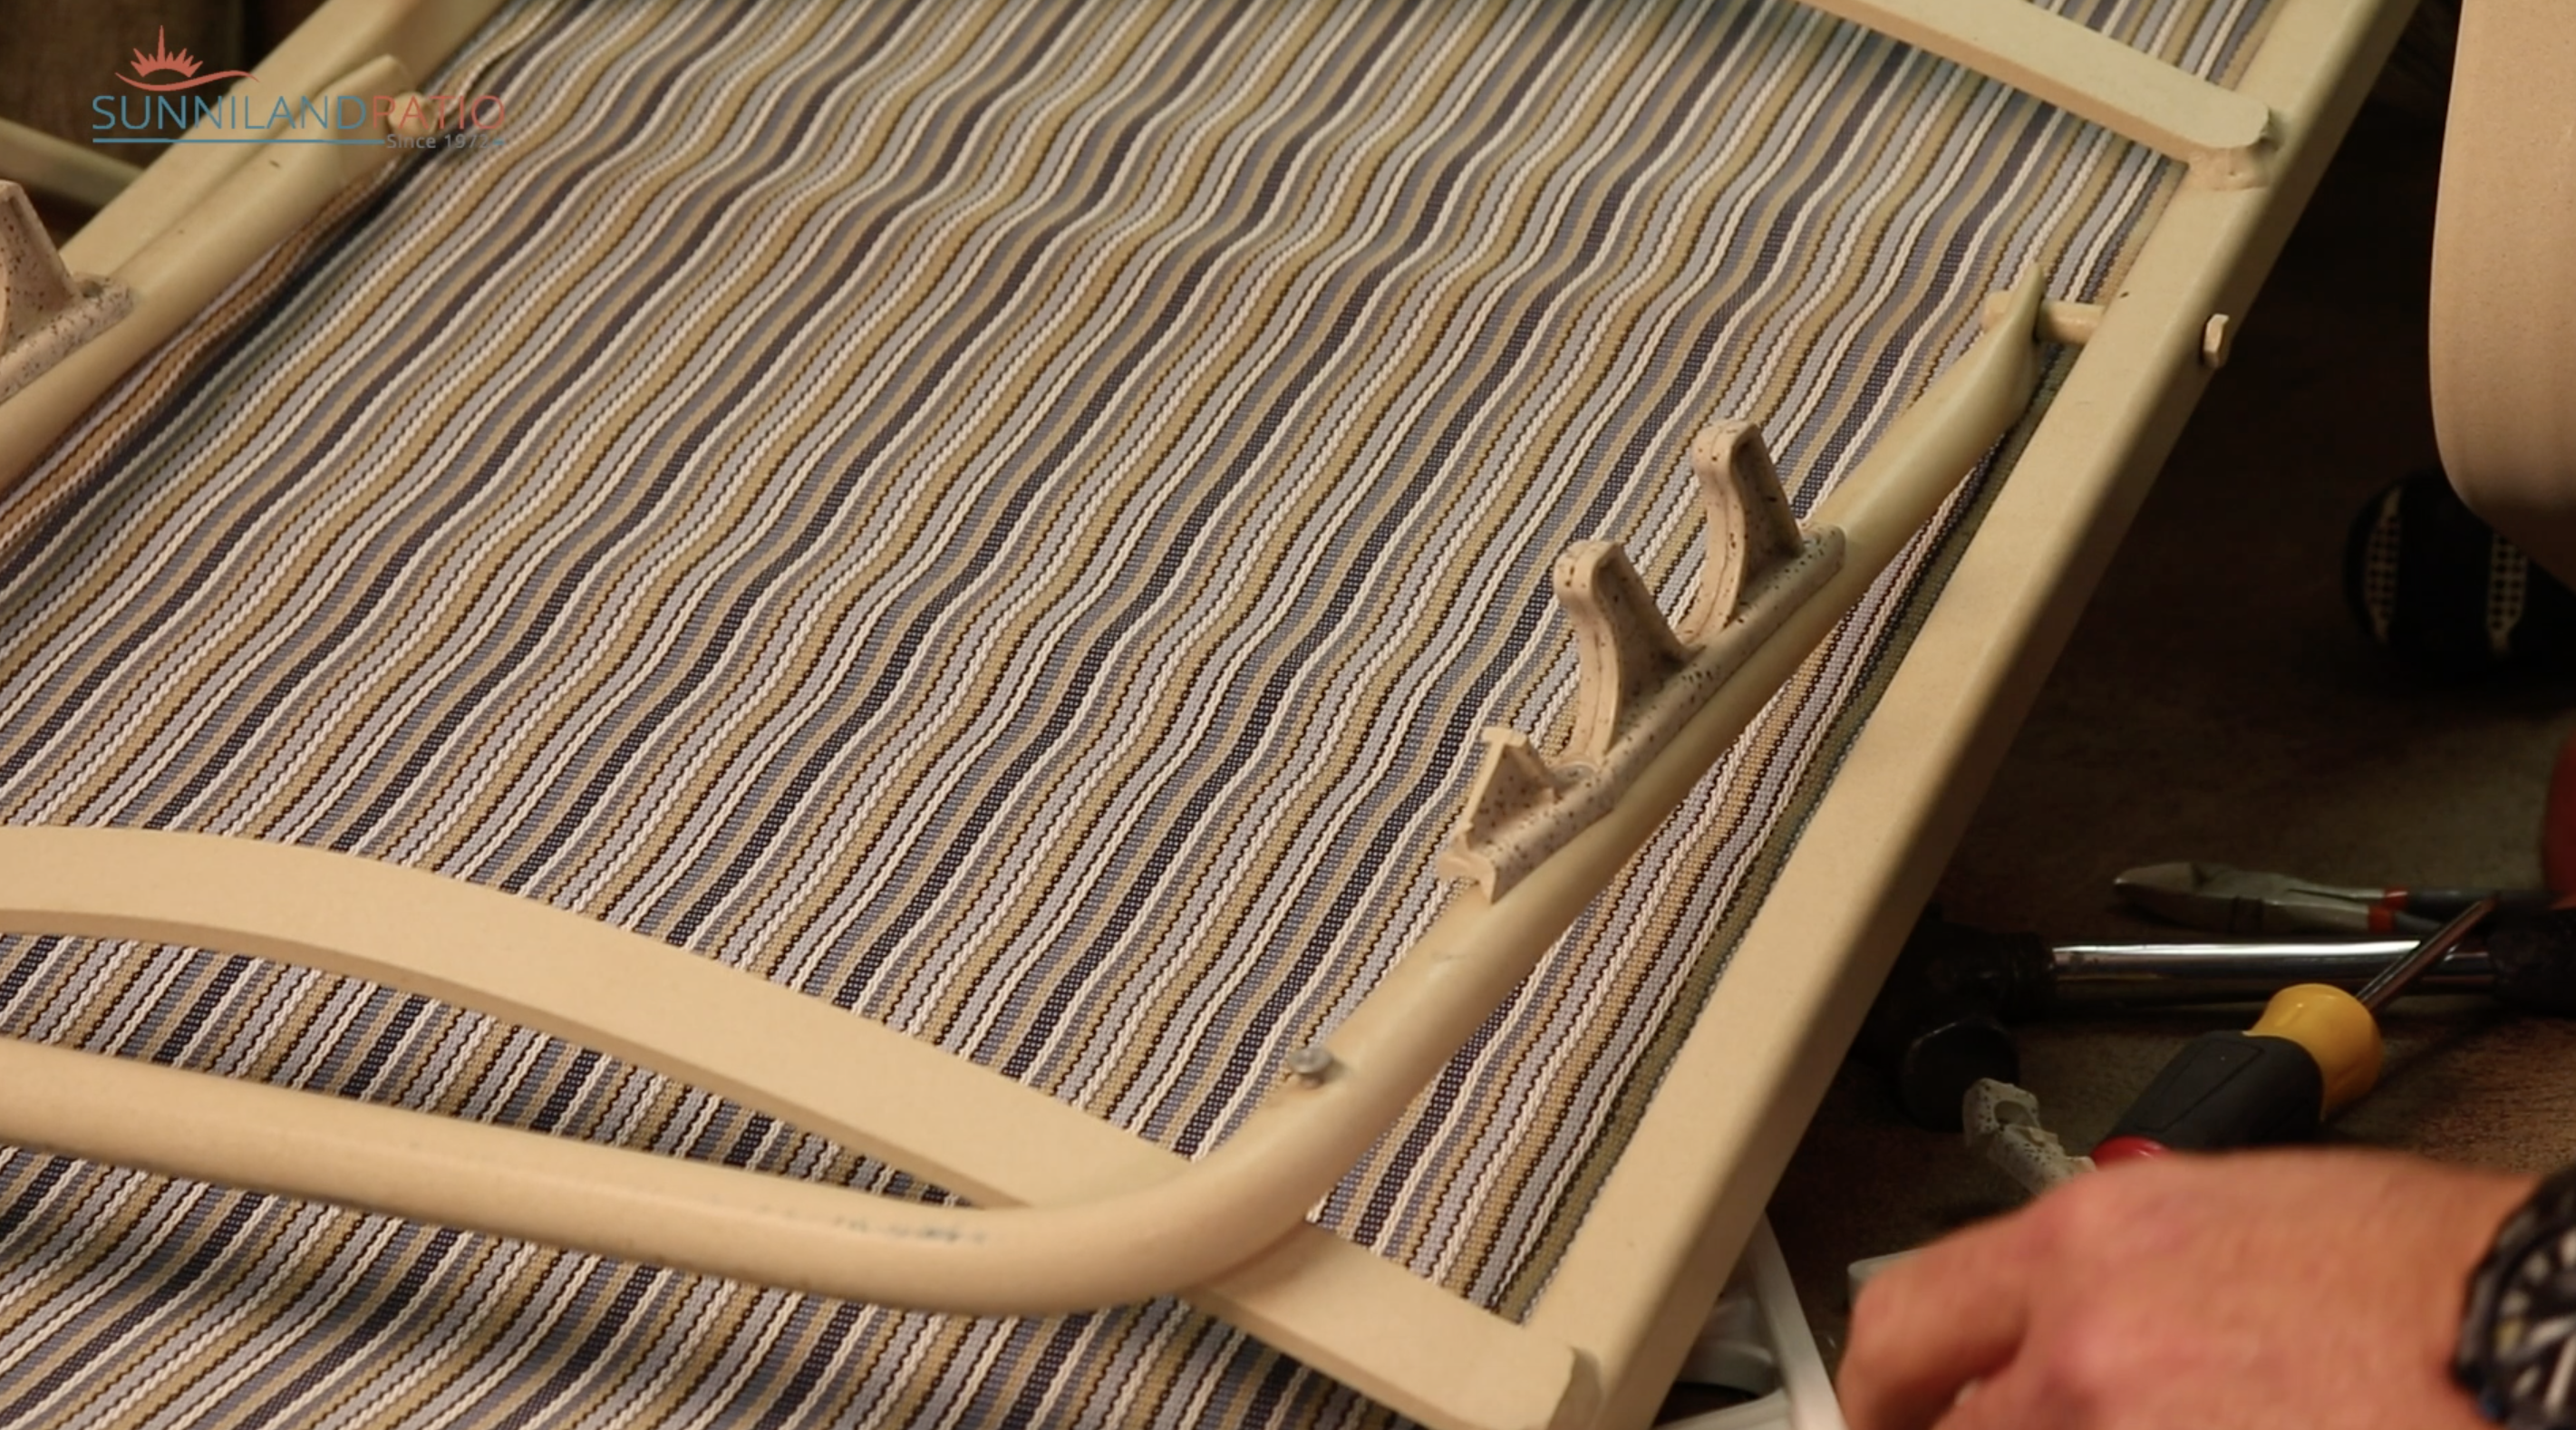
Step 3: Install the new adjustment brackets
If your chaise lounge uses the rivets, and you have a rivet gun then its a simple installation. Place the new brackets over the holes, and with your rivet gun install the rivets over the holes to fasten the bracket to the chair. If your chair originally uses rivets but you prefer to use a screw, then take the drill bit and drill a new hole for the screws, then align the bracket with the new holes and screw the screw on.
If your chaise lounge uses a screw then the installation is easier. Align the new brackets over the holes, take the drill bit to screw the screws on and there you have it!
In case the exciting holes dont line up, you can drill a new hole a quarter of an inch away from the old holes, align the new bracket over the new holes and screw it on.
Its always a good idea to replace both brackets on the chaise lounge because if one is brittle so is the other one and it will be safer to do so. Replacing them both at the same time will also guarantee you that they will wear out at the same rate, and you wont have to change them again for a long time.